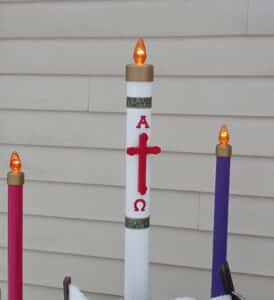
Step Up Your Flame Game: Build Your Own GINORMOUS Outdoor Advent Candle Wreath

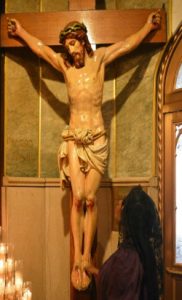
The wife and I were passing by a church several years ago and we happened to notice an impressively large outdoor Advent wreath at the frontage of the road. We talked about making a similar one as a witness to our Catholic faith. Candles are a major element of our traditions. You can learn more about the Catholic symbolism and other liturgical traditions involving candles.
If you are like us, you notice that your neighbors are so quick to decorate for Christmas and spoil the Advent season. So something like this helps make a counter cultural statement that what people understand to be the Christmas season really isn’t, and that preparing ourselves and counting down the weeks and days is important. So here is a how-to guide for parishes, businesses or homeowners to make their own giant Advent candle set!
Materials needed for the outdoor Advent wreath
- (4) 2” inch, 4-foot PVC risers (you can get better pricing and longer segments at your local hardware store).
- (4) 2” inch PVC riser caps
- Primer, purple, rose and gold spray paint
- (4) amber flame bulbs 25 W F15 or similar
- Bulb and connector di-electric grease (CRC #05107) or equivalent
- Petroleum jelly such as Vaseline
- (4) lamp bulb adapters, e.g. Leviton #61
- (4) 6-foot+ outdoor extension cords
- Electrical 3-way adapter
- (2) extension cords—as long as needed to reach outlet
- Plastic cups or some sort of circular plastic such as a water bottle (free-“come on, man, recycle!”)
- Boughs for the wreath and additional decorations (free to $$$, depending on your taste and resourcefulness)
Optionally, you might also buy an automated light timer so that the display will switch on and off automatically at dark. It would also be a good idea to buy a bunch of additional spare flame bulbs to make sure you can have matching ones on hand in case one burns out or gets damaged during assembly. Its also possible that a rapid change of temperature and precipitation could cause them to crack (e.g cold wet snow suddenly hitting a warm bulb).
Tools needed:
- Hacksaw
- Vise
- Electric drill with a 1-inch circular bit
- Circular file and sandpaper or similar abrasive with coarse and fine teeth
- Hand spade
- Rubber mallet (helpful, not required)
In addition, you will need a two-outlet outdoor electrical receptacle. For safety reasons, this should have an exterior-grade ground fault switch.
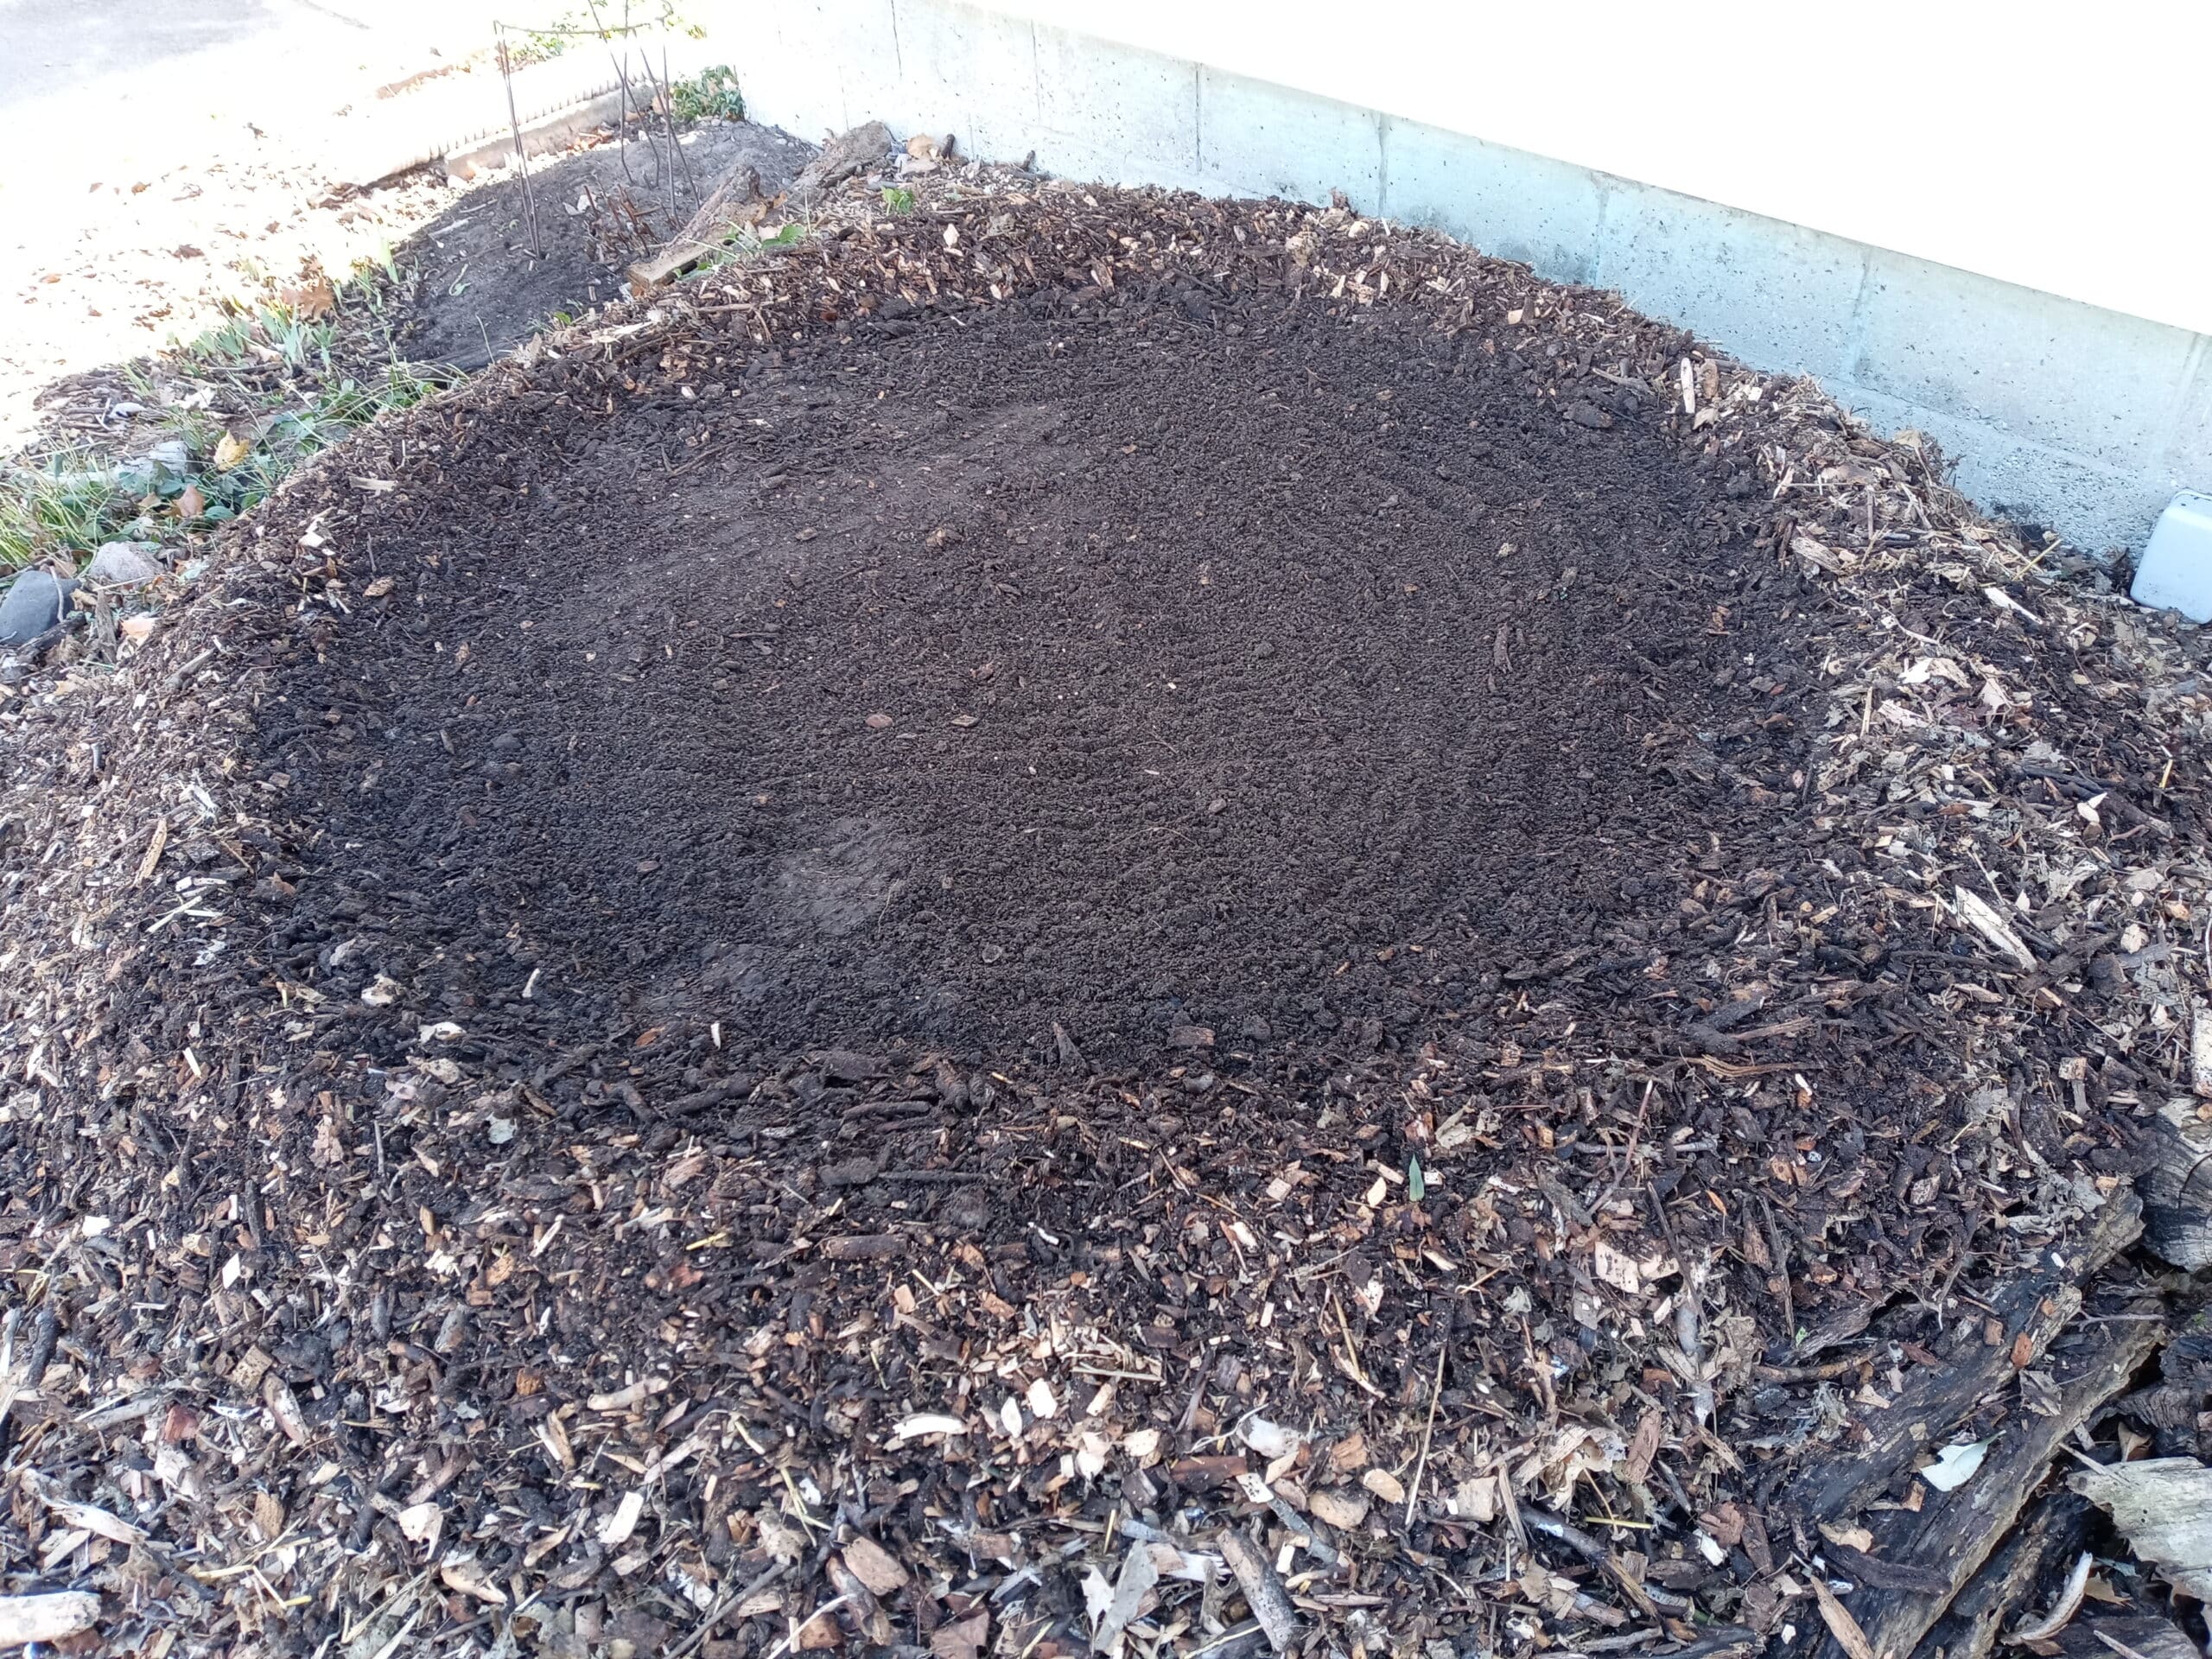
STEP 1: Prepare the Spot and Plan Out the Scale
Before you go to buy the materials, consider the best location based on the vantage point of the viewer (e.g. from the street etc.) as a gauge of the diameter and height of your candles. Elevating the location generally makes for a much more impressive display. For my wreath location, the garden soil is built up by about 2 feet from the ground. It originally started at a height of a little over one foot by burying yard waste and covering with soil. Each year, I add a base of wood chips to the location and then a thick bed of straw. Once Christmas is over, I remove the boughs and cover the old straw with a new layer of wood chips. Four years later its still growing. Consider also the backdrop behind the wreath. I just have plain old vinyl siding on my house. Weathered wood siding, brick or a screen of evergreens would obviously make a much better background.
At this time, consider if you want the candles to all be the same height or if you want the candles to become progressively taller so as to simulate the melting and differential heights of the candles that will result. Based on the viewer perspective and size of the garden area being used for your advent wreath, you might also consider a linear rather than a circular wreath. You might put wood stakes or old cardboard wrapping paper tubes into the ground as a reference as to how it will look.
One advantage of a linear wreath is you don’t have to figure out what to put in the center. It might look a little odd to have nothing in the center. Ideally, you can put a larger Christmas candle in the center. Since the candles are made in a similar way, you might want to tackle both projects together.
See my tutorial on how to make a life-sized manger!
Obviously you can always purchase or use a suitable feature such as a statue of the Blessed Mother with a pedestal as a central focal point for the center of the wreath.

For large lawns with buildings set back at a distance, you might consider using larger 3-inch PVC piping and caps. You might also go with a brighter bulb than 15 watts. I personally chose a weaker bulb because the nearby street lighting at our home diminishes the benefits of stronger lights and I prefer more subtle lighting. There isn’t much noticeable difference between a 25 watt and a 40 watt bulb unless your location gets really dark or is being observed from a long distance. For a small garden or yard area, you might chose to make smaller candles with 1.5-inch PVC, equating to something perhaps only twice the size of an ordinary wreath. For smaller candles, you will need to find the equivalent of a chandelier socket adapter and use smaller chandelier-sized bulbs.
STEP 2: Prep and paint the PVC risers

The easiest part of the project is painting the PVC risers (be sure to leave extra for the underground part if no sconce base is used). If you use an outdoor latex paint, prime the PVC first with a stain-kill product. I would recommend stainkilling the risers even if you use spray paint as the manufacturer printing marks on the PVC will tend to bleed through several layers of spray paint. If you don’t have a workbench, sliding them over a shovel handle pushed into the ground makes a convenient way to stand them up for painting.
Keep in mind that spray paint does not stick well to itself when wet, especially on a non-porous surface. Resist the temptation to spray one or two heavy coats of spray paint and then be done with it. Applying five or six light coats is much better! You might intentionally spray excessively near the top to form some drips to simulate dripping wax (or console yourself in this if dripping happens) but its doubtful that drips would be noticed anyways in most yard settings where its not viewed close up. Be sure to save the extra paint for future touch ups of the inevitable scratches in the paint!
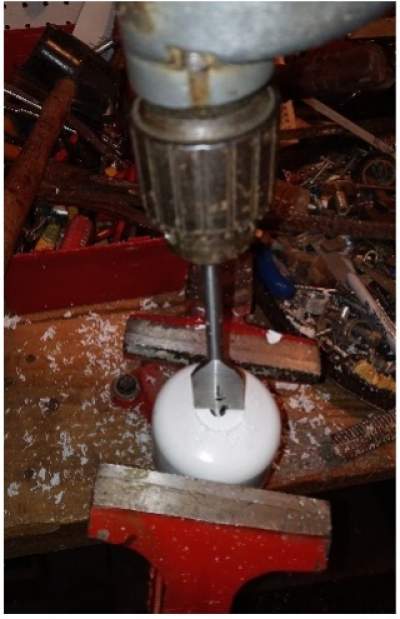
STEP 3: Prep and paint the riser caps (“followers”)
The gold caps (or silver or another metallic hue) placed on the top of each candle will become what is called a “follower.” Besides looking nice and give a candle a formal finished look, a candle follower functions to contain the melted wax and makes the candle burn more evenly with less drippage. With this candle set, they will function to hold the bulb and shield the electrical socket and wiring from moisture.
Begin by sanding off the raised PVC lettering on the caps (if present) with a file (you can skip this if people won’t be observing from close up as it won’t be noticeable at more than 4-6 feet). I found out the hard way that if you put the caps on a painted riser, they will stick and can be hard to get off. Sanding the inside of the PVC caps also will help them fit more loosely. Applying a bit of petroleum jelly or other lube will also help them slip off. If they become stuck, rather than trying to put a wrench around them and unscrew it (which is difficult and will likely damage the paint), gently tap the lower lip of the cap with the head of the file (or similar blunt instrument) by striking with a hammer all the way around until it works itself off.
To prepare the followers, bore a hole in the top of the four caps using a 1-inch drill bit. Then, using a circular file smooth out the rough edges of the hole as needed. Screw in the light bulb in the hole to verify the hole fits. Its better for the hole to be tight around the bulb’s threads–but not so tight that you risk the bulb getting stuck and breaking when you twist it!
Apply one or two coats of stainkill primer as needed. Spray paint the followers, again taking your time by applying several thin coats (you definitely want a nice finish with no drips for these!).
The Road to Bethlehem: Daily Meditations for Advent and Christmas

STEP 4: Pre-install the candle risers (for final sizing purposes)
Measure the desired distance between each candle if a linear wreath or use something circular as a guide for a conventional wreath and mark the ground locations. Another option is to use an old shower curtain or other plastic liner and cut it and mark it with holes and use it as a template. The next step then is to drive the candle into the ground, with a rubber mallet or place it in a hole, dug with the spade, to determine its finish height. I think it looks better to have the heights increase in the order of burning but you might decide based on your personal preference to make them all the same height. The texture of your lawn or garden soil with determine how deep the candle must be pressed into the ground for the candle to be stable. In soft soils, you might be able to drive the risers with a rubber mallet–in other soils you might need to dig a hole using a hand spade. Another option is to drive a metal or wooden stake into the ground with a diameter just less than 2 inches so that the candle tube can be slid over it. This might be a better option if the ground is going to freeze hard before you set up the wreath. After you have decided on the finish height, cut off any excess candle length with a hacksaw and mark the candle just above the ground level for the drill hole.
If you live in an area where the ground doesn’t freeze, you could go next level realism and push them deeper into the ground as Advent season goes on to simulate the candles melting and decreasing in height!
Find one with the largest flange and sleeve for the most support.
for larger candles (remove the cap, paint and add ornamentation)
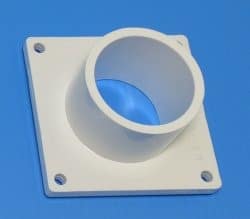
Another option is to install a decorative holder for each candle, called a sconce or a capital. Refer to the companion Christmas candle article for suggested options. With this option, the candles can be measured and cut to a specific desired height without the need for leaving excess to be buried below ground.
STEP 5: Drill the cord hole in the riser
Drill the hole in the candle riser near the bottom for the electrical cord to be threaded through. A 1-inch hole with not be large enough to thread the cord through so you will need to enlarge it. You can use a file to enlarge it. You can also drill another 1-inch hole next to it, but not connecting the holes (if you drill the second hole connecting the first hole as in a “figure 8” shape, the drill will badly kick as soon as it reaches the first hole and injury could result, trust me on this!). Cut or knock out the spur separating the two holes and then file it until the hole becomes one continuous oval large enough to thread an electrical plug through it.
STEP 6: Connecting the electrical components

Because of the additional thickness of the follower cap in between the bulb and the adapter, you likely will not be able to screw in the bulb all the way to make enough contact to light the bulb. I found that by hacksawing off about 2 mm of the lip of the adapter (this is the excess plastic that extends above the interior metal threads of the socket) was enough to make a good connection sufficiently offsetting the 3-4 mm thickness of the cap. Be careful screwing in the light bulbs and stop at the first sign of resistance–I broke two bulbs screwing them in too tightly (these flame-style bulbs seem to be more fragile than regular light bulbs). Use the dielectric grease around the bulb connection with the socket and around the area where the bulb penetrates the cap hole to try to insulate the electrical from moisture intrusion. Since the grease is pricey, I would recommend an additional bead of petroleum jelly around the base of the bulb to protect the underlying grease from being washed away by snow or rain. A lower cost option would be to take a scrap of foil and roll it into a thin bead and compress it into the gap between the bulb and follower.
For each candle, run the electrical cord through the candle and connect everything in series (bulb, follower, adapter and then extension cord). Consider adding the three additional bulbs sequentially at the beginning of each week so that the wreath would look correct while unlit during the day (unless you choose to leave it lit 24 hours a day).
STEP 7: Running and connecting the electrical cords
It is recommended at this point to connect everything and test it out in advance and make sure that it works. These instructions call for an electrical 3-way adapter since 4-way adapters are extremely hard to find (or perhaps not made?). So one candle will be connected by itself via an extension cord to the second outlet. Obviously, you can accomplish the same thing using two 2-way adapters instead. Consider if you will need additional adapters or power cords if you decide to add string lights or anything else such as a central Christmas candle to the wreath. Connect to the automated light timer if desired. Hopefully, you have connected everything properly and all four candles are lit.
STEP 8: Testing the power load (optional)

If you have significant additional lighting on that circuit, you will want to connect those things also to verify it can handle the load of multiple sources. For example, I also have up to 8 additional lighting strands, roofline icicles and two exterior light bulbs on the same circuit without tripping the breaker, Keep in mind that its normal for the outlet breaker to trip a couple times each winter due to some random condition. Any more than that could mean you are stressing the circuit with too much draw of power.
STEP 9: Installing the open socket protectors
Assuming you will be adding the light bulb flames on a weekly basis, unscrew the bulb and remove the follower from candles for weeks two through four. Cut out three additional circular plastic covers to put over the socket of the adapters to protect them from the elements when there is no light bulb screwed in. Cut the bottom of a disposable plastic cup to fit. The bottom of a bottled water container or similar plastic container would also do the job. Again, check that the cap is loose enough to be easily removed. Each week when you go to install an additional bulb, you don’t want to be messing around trying to remove the follower to get the plastic cover off. Covering or stuffing the hole with saran wrap might also work as well.
STEP 10: Final adjustments
Touch up the paint on the candles or followers from any scuffs or scratches that may have occurred during installation. Step back and observe if the candles are all standing perfectly straight–some probably aren’t. Determine how they are leaning and take a stick, large wood chip or something similar and stick it in the base of the hole to shim it and get it to stand straight. Remove the bulb and tap or dig the hold deeper to fine tune the height as needed. Recall that candles don’t necessarily burn at even rates so don’t unnecessarily obsess about getting the heights perfectly proportionate to each other.
The Sermons of St. Francis de Sales: For Advent and Christmas
STEP 11: Arrange the wreath
Once all the candles are fully assembled with the cords connected, all that remains is to add the evergreen boughs at the base. You may be able to cut these yourself from trees in your yard or someone else you know who might want their tree trimmed. Otherwise, if you go to a place where live Christmas trees are sold that often have scrap boughs for sale (or you could buy a whole tree and dismember it). Support a local parish or Catholic School Christmas tree sale if you can!
After Christmas, add accent decorations to the wreath such as shiny balls, large pinecones or whatever other decorations you would like (in the Spirit of Advent try to refrain from additional decorating your wreath except for possibly a large purple bow or purple string lights. You can find additional ideas at the end of the Christmas candle article.

FINAL STEP: Admire all your hard work (and of course, take a photo and post on social media)!
Once you are done, take a minute to sit back and admire your impressive and handsome giant wreath that you built for under $200 (hopefully!). Show it off on social media to give people more encouragement to decorate for Advent first rather than Christmas. Don’t forget to mention or hashtag BeautySoAncient.com :)!
You might find yourself leaving it lit on those many dreary overcast December days. Periodically add more petroleum jelly at the base of your light bulb to replace what evaporates or is washed away to protect the sockets from moisture damage. And most of all, don’t forget to use it now as a daily and weekly reminder to help properly prepare your interior life for the coming Savior’s birth!
This article was originally posted in 2022.
- Got Holy Water? Don't Let Your Soul Get Too Dehydrated - April 2, 2026
- St. Joseph: Unleash the Terror of Demons - March 19, 2026
- The Feminine Heart of Catholic France: St. Anne d’Auray, Chartres, and St. Thérèse of Lisieux - March 9, 2026