Proclaim Your Flame Game: Make Ginormous Outdoor Christmas Candles
How would you like to learn how to make large, outdoor Christmas candles? This is an excellent project for the next Advent and Christmas seasons.
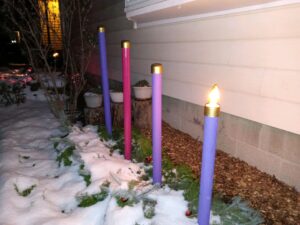
You can make one candle for your Advent wreath or you can make multiple outdoor Christmas candles for the Christmas season.
You will want to build your Advent Wreath first before tackling this project. Check out: Step Up Your Flame Game: Build Your Own GINORMOUS Outdoor Advent Candle Wreath.
Adding an outdoor Christmas candle to your outdoor wreath, adds some additional liturgical accuracy to it. Otherwise, once the 25th arrives, the wreath seems to be past it’s time. Who wants to be removing something from their yard on Christmas Day?
If you are really ambitious you might tackle both projects simultaneously. Not having such an abundance of time, I made the Advent candles first and then added the Christmas candle the following year.

First a little background.
Traditionally, the white candle is placed in the middle of the wreath and lit on Christmas Eve. This candle, the “Christ candle,” represents the life of Christ. The color white represents the purity of the sinless Christ Child, our Savior. It also represents the proper Liturgical Color of Christmas Eve and Day. There is some additional beautiful symbolism in the wax of the candles.
Read more here about the symbols of candles and fire.
Basic Materials Needed for Outdoor Christmas Candles
- 3” inch PVC riser (or a smaller or large size). You might buy extra length for the Advent candle bases–see below.
- (1) 3” inch PVC riser cap
- Primer, white paint and gold (or silver) glossy finish spray paint
- amber flame bulbs (40 Watt F15 medium base or similar)
- bulb and connector di-electric grease (CRC #05107) or equivalent (or scraps of aluminum foil)
- petroleum jelly such as Vaseline
- (1) lamp bulb adapters, e.g. Leviton #61
- (1) 6-foot+ outdoor extension cord
- Metal toilet brush holder (don’t laugh) or similar and gutter spike (for the optional base)
Additional Optional Decorative Materials (for sample shown)
- Decorative border ribbon
- Painters caulk or wood glue
- Wooden cross
- Wooden craft circles
- Red paint (oil-based or outdoor grade latex)
- Acrylic aerosol spray sealant
- Screw
- Pre-cut Alpha and Omega letters or craft sheet vinyl or similar semi-rigid sheet material
Tools needed:
- Hacksaw and hand jigaw or utility knife
- Tin snips or similar heavy-duty shears
- Hot glue gun (and glue)
- Vise or workbench
- Electric drill with a 1-inch circular bit
- Circular file and sandpaper or similar abrasive with coarse and fine teeth
- Rubber mallet (helpful, not required)

STEP 1: Planning Out the Scale
Before you go to buy the materials, consider the height of your Advent candles as a gauge of the diameter and height of your Christmas candle. The outdoor Christmas candle should be proportionately taller. For the photos in these articles, the very common 2-inch PVC were used for the Advent candles and the 3-inch PVC was used for the Christmas candle. For a small garden or yard area, you might chose to make the Advent candles with 1.5-inch PVC and the Christmas candle with 2-inch PVC.
STEP 2: Prepping and painting the PVC riser
The easiest part of the outdoor christmas candle project is cutting the PVC riser to the desired height and painting it. If you use an outdoor latex paint, prime the PVC first with a stain-kill. I would recommend stainkilling the riser even if you use spray paint as the manufacturer markings on the PVC will tend to bleed through several layers of paint. If you don’t have a workbench, sliding it over a shovel handle pushed into the ground makes a convenient way to stand it up for painting (weather and climate permitting).
Keep in mind that spray paint does not stick well to itself when wet, especially on a non-porous surface. Resist the temptation to spray one or two heavy coats of spray paint and then be done with it. Applying five or six light coats is much better! You might intentionally spray excessively near the top to form some drips to simulate dripping wax (or use this excuse if dripping happens!) but its doubtful that anyone would notice the drips anyway, in most yard settings where its not viewed close up.
Drill the hole in the candle riser for the electrical cord to be threaded through. A 1-inch hole will likely not be large enough to thread the cord through so you will need to enlarge it. You can use a file to enlarge it. You can also drill another 1-inch hole next to it, but not connecting the holes (if you drill the second hole connecting the first hole as in a “figure 8” shape, the drill can kick when it reaches the first hole and injury could result). Then cut or knock out the spur separating the two holes and then file it until the hole becomes one continuous oval large enough to thread an electrical plug through. You might defer this drilling part to the next step and do all your drilling at the same time.
Four excess pieces of the 3-inch riser (9-12+ inches depending on the height of your candles) could be saved and used for installing the 2-inch riser Advent candles into the ground. These could be dug into/rubber malleted into the ground. Then the candles could be inserted and the annular space filled or shimmed. Just be sure that the portion of the riser base protruding from the ground is short enough that it doesn’t cover up the hole in the candle for the electrical cord.
STEP 3: Prepping and painting the riser cap (“follower”)
The gold cap (or you could go with silver) on the top of the candle is called a “follower.” Besides looking nice and giving a candle a formal finished look, it functions to contain the melted wax and make the candle burn more evenly with less drippage. With this candle though, it will function to hold the bulb and shield the electrical socket and wiring from moisture.
Begin by sanding off the raised PVC lettering on the cap with a file. (You can skip this if people won’t be observing from close up as it won’t be noticeable at more than a few feet.)
If you just put the caps on a painted riser, they will stick and be hard to get off. Sanding the inside of the PVC cap will help them fit more loosely (you will appreciate this when you have to go outside and replace a burned out bulb!). Applying a bit of petroleum jelly or similar lube will also help them slip off. If if gets stuck, rather than trying to put a wrench around them and unscrew it (which is difficult and will likely damage the paint), gently tap the lower lip of the cap with the head of the file (or similar blunt instrument) by striking with a hammer all the way around until it works itself off.
Using a 1-inch coring drill bit, bore a hole in the top of the cap. Then, using a circular file smooth out the rough edges of the hole as needed. Screw in the light bulb to verify it fits. Its better for the hole to be fairly tight around the bulb’s threads to limit the gap that could allow moisture intrusion–but not so tight that you risk the bulb getting stuck and breaking when you twist it in!
Apply one or two coats of stainkill primer and then paint the cap gold (or silver), again taking your time by applying several thin coats (you definitely want a nice smooth finish with no drips for this!).
You might also go with a brighter bulb than 15 watts. I personally chose a weaker bulb because the nearby street lighting at our home diminishes the benefits of stronger lights and I prefer more subtle lighting.
STEP 4: Connecting the bulb and electrical
For the outdoor Christmas candle, I think its obviously better for it to be brighter than the Advent candles bulbs. So I chose 15 watt bulbs for the Advent candles and 40 watt for the Christmas candle bulb.
Because of the additional thickness of the follower cap situated in between the bulb and the adapter, you likely will not be able to screw in the bulb all the way to make enough contact to light the bulb. I found that by hacksawing off about 2 mm of the lip of the adapter was enough to make a good connection sufficiently offsetting the 3-4 mm thickness of the cap. Be careful screwing in the light bulb and stop at the first sign of resistance. I broke two bulbs screwing them in too tightly (these flame-style bulbs seem to be more fragile than regular light bulbs).
Use the dielectric grease around the bulb connection with the socket and around the area where the bulb penetrates the cap hole to try to insulate the electrical from moisture intrusion. Since the grease is pricey, I would recommend an additional bead of petroleum jelly around the base of the bulb to protect the underlying grease from being washed away by snow or rain. As another option that might be easier, take a small thin piece of foil, roll it into a bead and pack it evenly into the gap around the bulb.
For the candle assembly, run the electrical cord through the candle and connect everything in series (bulb, cap, adapter and then extension cord) to confirm everything is working fine prior to installation.
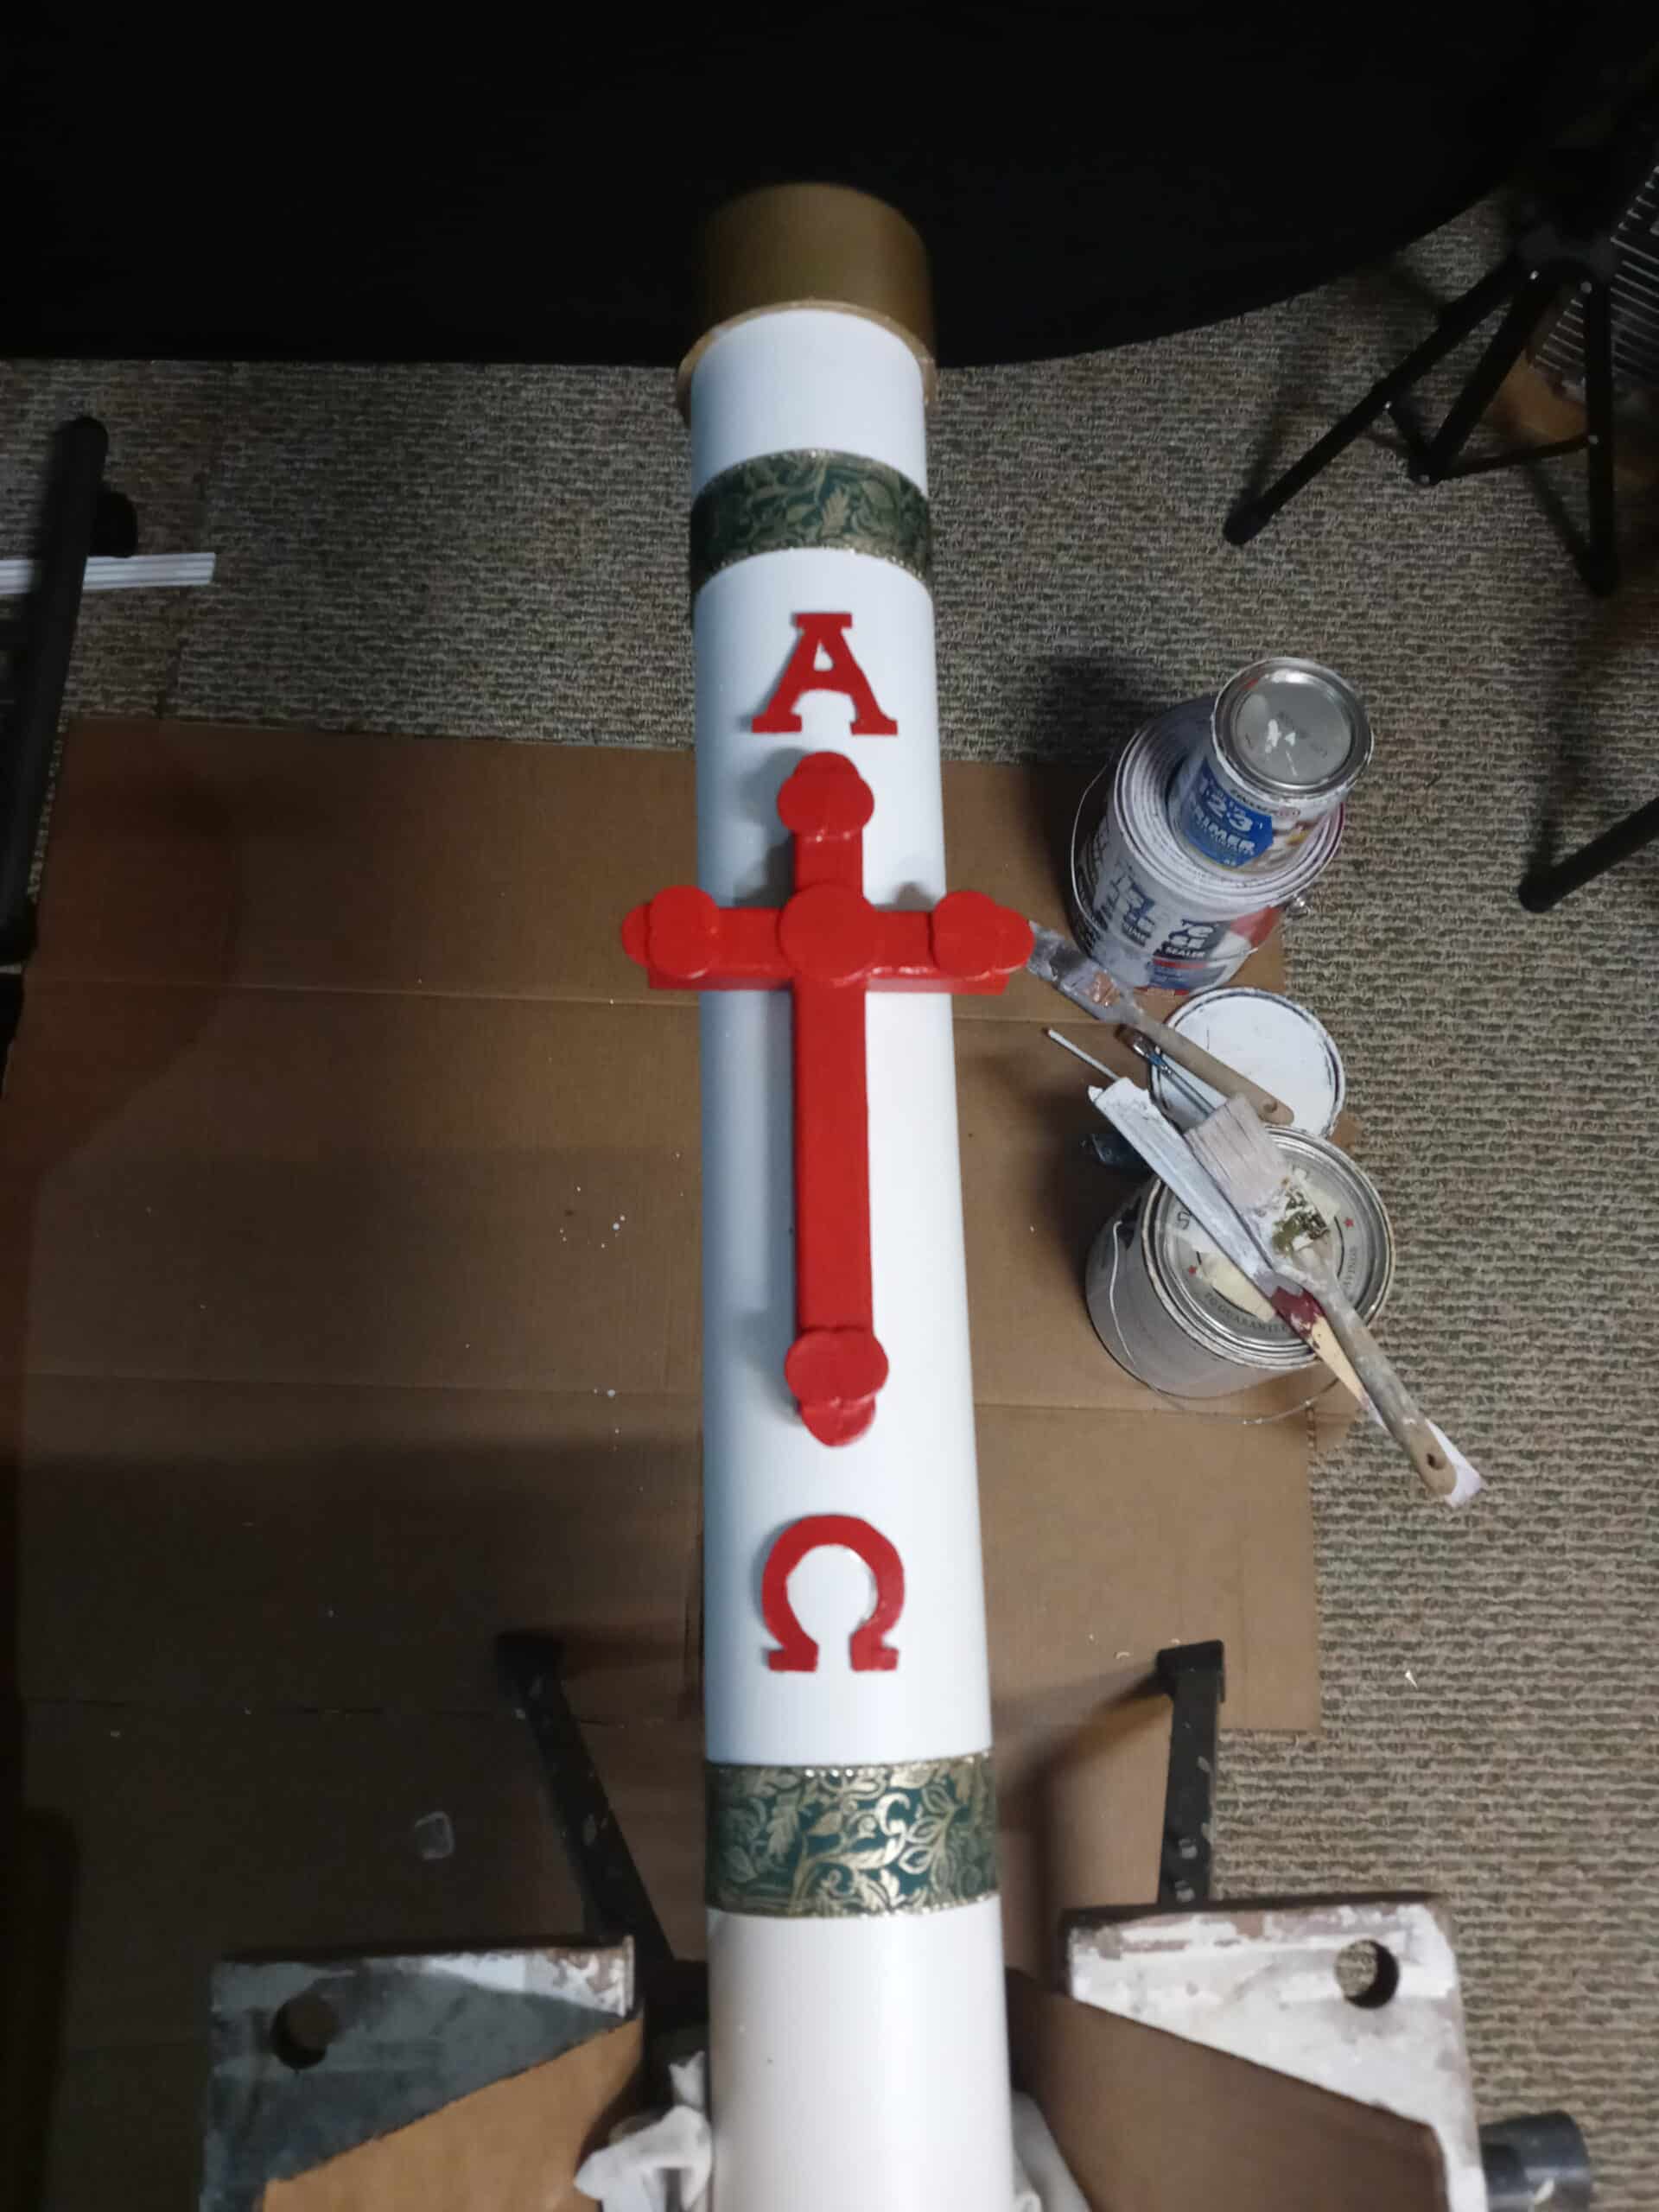
STEP 5 (OPTIONAL): Adding the Bling to Outdoor Christmas Candles
Now comes the fun part. Here is where you can use your own creativity to customize the candle to your liking. The instructions include what I decided I thought looked best. Peruse Pinterest or do an internet search for ideas on the various types of Christmas candle details and adapt accordingly. However, here is what I did (refer to the list of decorative materials above):
- Using caulk or glue to fasten the wooden circle ornamentation to the cross
- Arrange and cut the 3 wooden circles at each tip of the cross (removing the overlapping parts with knife or saw)
- Add one larger circle in the center of the cross (this could be painted white as a Eucharist reference)
- Glue and or caulk the cross details into place
- Prime and then paint the wooden cross detail (I applied shiny acrylic sealant for additional protection from the elements)
- Cut out and paint the Alpha and Omega letters as needed
- Drill a pilot hole in the riser where you will install the screw and hang the wooden cross (mine had the teardrop-like slot in the back for hanging)
- The cross will need an additional dab of glue near the bottom to keep it straight in blowing wind
- Arrange and glue the additional details including the ribbon borders at the top and bottom of the detail area
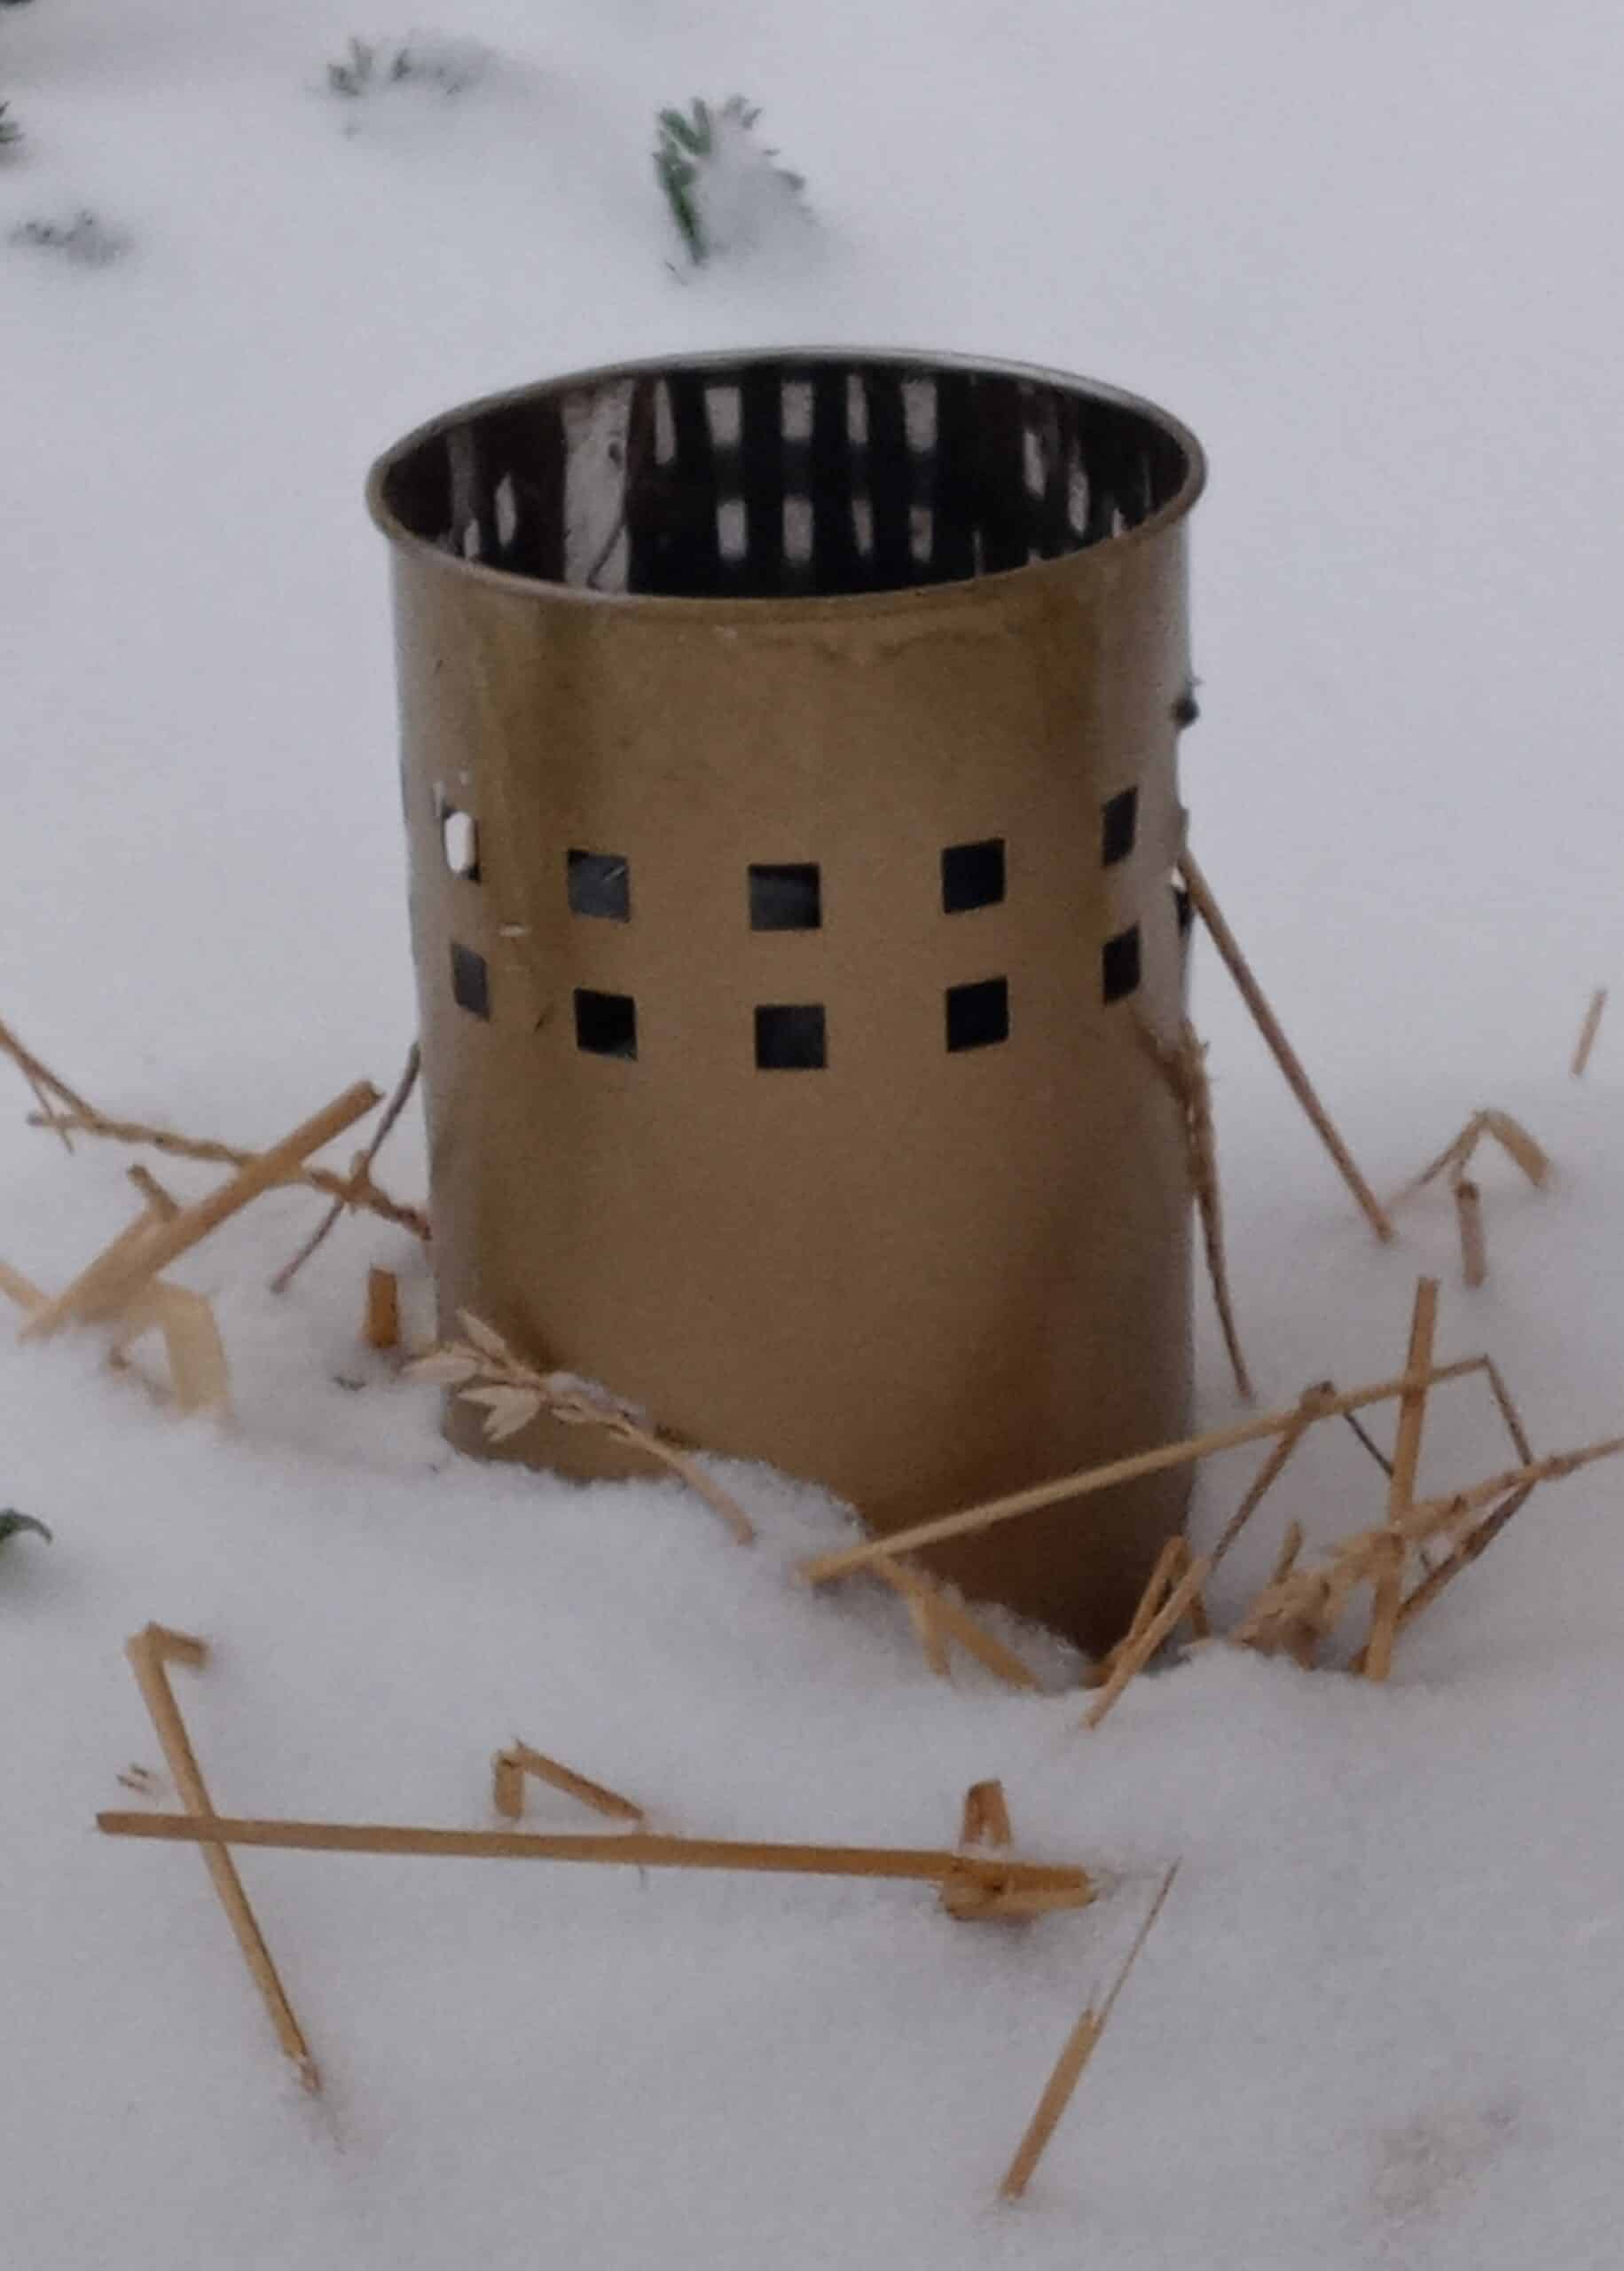
STEP 6 (OPTIONAL): Preparing the base for Outdoor Christmas Candles
The simplest and crudest method of installing outdoor Christmas candles is just to leave enough excess length so that the base of the riser can be installed in a hole dug into the ground.
However, I wanted to go for an additional more finished look. I had saved a metal toilet brush holder, that just so happened to be pretty close to the right diameter to serve as an ornamental base (sconce) for the outdoor Christmas candle. So I spray painted it gold to match the follower.
First, I drilled a hole at the bottom. Then I secured it into the ground by digging it into the ground a bit and then driving a long spike through the hole. The spike hole, if not tight, can also allow for drainage, otherwise put a few drainage nail holes in the bottom. Depending on how tall the sconce and how tight the fit is, you might need to use a little bit of thin string or fishing line to give the candle additional support from leaning or being buffeted by the wind (mine did). If the sconce will be readily visible, consider additional ornamentation along the top lip (such as matching gold leaves, ornamental gold ribbon etc.).

Another Mounting Option
Another mounting option without a decorative base could be to obtain a PVC riser mounting flange but I haven’t tried it myself so be warned. The important consideration is that the lip of the flange is tall enough to keep your securely candle in place. This option it works would make installation fairly easy working with frozen ground because you would simply need to secure it by hammering in four very long nails. Again, the length of the nails would be important in supporting the weight of the candles so use the longest nails you can find and hope for the best!
STEP 7 (OPTIONAL): Adding the Additional Wreath Bling
I generally discourage other decorations on the Advent wreath except for perhaps a large purple blow. During Advent, you want to be consistent with the theme of austerity and simplicity. However, once Christmas arrives and you have lit your Christmas candle, it seems appropriate to add additional decorations to the evergreen boughs. These things can include:

- pinecones
- a decorative ribbon or banner with a message on it
- a large red ribbon bow or gold ribbon bow
- strings of white or multi-colored lights
- Christmas tree balls
- large red or golden berries
- angel figurines or statuettes
- poinsetta flowers
- a winter bird or similar snowy animal accent figurine
- fake snow spray (assuming you live in a warm climate and Almighty God is not providing it)

Once you are done, don’t forget to post pics of your beautiful Advent wreath-Christmas candle combo creation on social media and…(ahem) don’t forget to show Beautysoancient.com some H/T love!
- Got Holy Water? Don't Let Your Soul Get Too Dehydrated - April 2, 2026
- St. Joseph: Unleash the Terror of Demons - March 19, 2026
- The Feminine Heart of Catholic France: St. Anne d’Auray, Chartres, and St. Thérèse of Lisieux - March 9, 2026